For two years I have struggled to get the grass to grow better underneath the beautiful evergreen tree that grows in my front yard. I’ve tried a number of solutions, but the grass grows poorly and even the weeds aren’t doing much better!
I came up with a way to use a raised bed planter to improve the appearance of my front yard and to extend my tree ring. I hope my story will help inspire you to come up with your own tree ring ideas to adapt to your unique landscape challenges.
Why is it Difficult to Grow Grass Underneath Evergreen Trees?
There are a number of factors that make it hard to grow anything under an evergreen tree, not just grass.
- Thick Foliage – Evergreens, including my very healthy Colorado Blue Spruce, tend to have dense growth. They have many layers of branches that are heavily covered in needles that collect as much sunlight and water (rain, snow, sleet, etc.) as possible. Branches tend to grow very close to the ground.
- Dense Root Systems – Evergreens are very good at competing for water. They have good root systems, including a network of small roots just under the surface of the soil that suck up any available water.
- Needle Mulch – Evergreens drop so many needles that eventually the ground under the tree develops it’s own mulch blanket of needles. This further reduces the amount of sunlight that reaches the ground.
- Acidic Soil – The soil around an evergreen tends to acidic, making it hard for other plants to grow. This is primarily due to decomposition of the needles that drop from the tree.
What I Tried to Revive the Lawn
Knowing all these things, I thought surely I could make some amendments that would improve the appearance of my lawn underneath an evergreen. This is what I did:
- Trim the lower branches – My tree was planted 25 years ago, so it is fairly tall and (luckily) nicely shaped. I trimmed all the lower branches up to at least 5 feet from the ground.
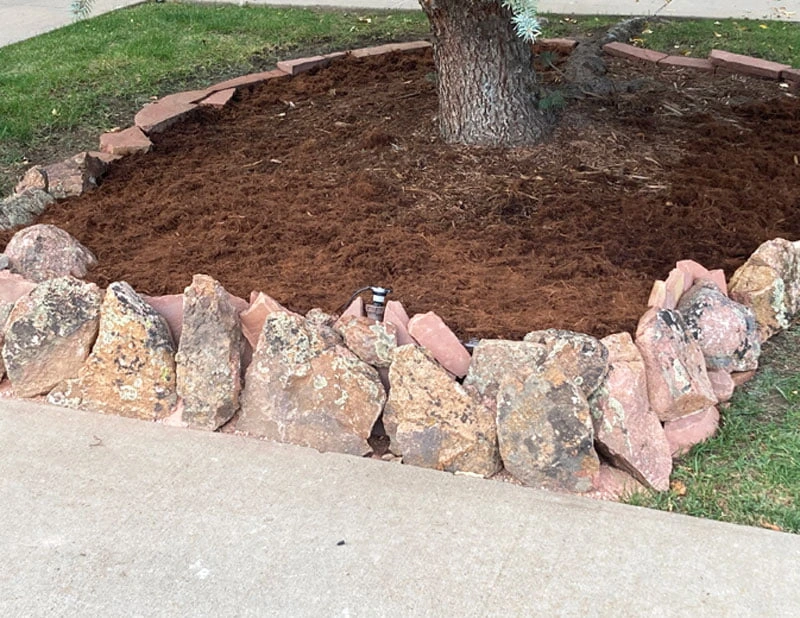
- Cede the ground directly under the tree – I built a tree ring around the base of the tree that is about 12 feet in diameter. This is the one you see in my ‘before’ picture. The ground around the tree ring gets direct sunlight for at least half of the day. I used pieces of local red sandstone to form the ring. I filled the tree ring with a good mulch called Gorilla Hair that is made from redwood slash. It looks better than just evergreen needles and it helps keep the moisture around the base of the tree and keeps the weeds to a minimum.
- Improve the Irrigation – I adjusted all my popup sprayer so that all of the grass around the base of the tree would get water. I switched most of the popup sprinkler heads to the ‘dual level’ or ‘under spray’ variety to get better ground coverage. If you have a system that is compatible with the Rainbird brand, I highly recommend the popup heads that start with the letter ‘U’. I’ll link a sample below.
- Adjust the Soil pH – I treated the soil outside the tree ring with Garden Lime a few times to sweeten the soil. I was able to get the soil to test at a pH of 7.0 (neutral). For more about soil pH and how to test it, see: Soil pH: Balancing Your Garden Soil (link opens in a new tab).
- Over-seed with Grass Seed – I got some grass seed that was specifically for lower light situations and over-seeded the lawn all the way around the tree ring.
Sadly, after all of these changes I didn’t see much improvement.
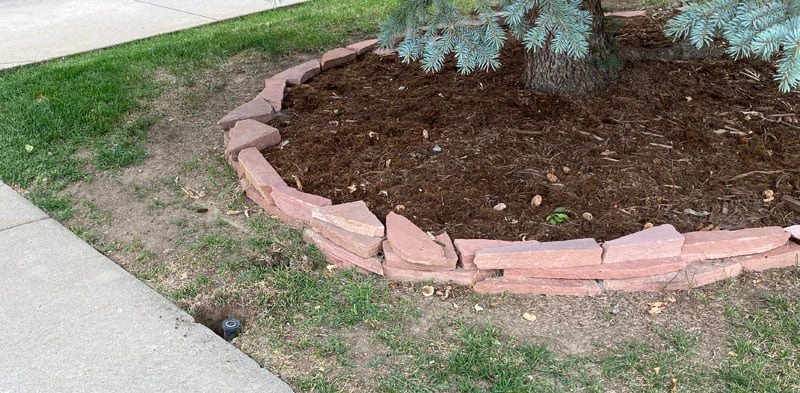
I really needed to extend the tree ring all the way to the sidewalk. Using this style of tree ring lined up along the sidewalk offended my design sensibilities, so I needed to come up with tree ring ideas.
One of the things I had going for me is that popup sprinkler near the sidewalk. Rainbird makes a conversion kit that can turn a popup sprinkler location into a drip irrigation system with up to 6 drip lines or micro-bubblers. Since I had easily available water and the area does get sunlight, I decided this was a perfect spot to add a raised bed planter.
Designing a Raised Bed Planter Tree Ring
Inexpensive yet sturdy raised bed choices have flooded the market in recent years. They come in a variety of sizes and colors. I didn’t really want a shiny metal ring to be the first thing that you see when you approach my house, though. I decided that the solution was to wrap the raised bed planter with some nice looking stone.
Building a stone wall that will support holding dirt within it is difficult, especially if you don’t want to use mortar and stabilizing parts such as rebar. The wide selection of light weight and sturdy metal raised bed planters available online solve the support problem though. They tend to be inexpensive, and the finishes aren’t great, but they are really good at holding dirt in place. Combining the two elements can result in a great looking raised bed that won’t require much (if any) maintenance.
The area I had available for the raised bed was about 7 feet wide, and I wanted the bed to be about 1 foot high which would fit into the slope from the base of the tree down to the sidewalk. I would add mulch between the raised bed and the tree trunk and existing tree ring to give a smooth visual transition. While there are lots of raised bed choices, none were quite the size I wanted, so I picked a package containing two 4’x2’x1′ raised planter beds, but that had metal sections that were in 1 foot increments. The plan was to make a single 7’x2’x1′ planter and use the two leftover rounded ends for something else.
I selected a metal planter that was finished with a dark brown paint. This seemed like the best color to blend in with the stone I was using. My goal has for very little of the metal to be visible in the finished project.
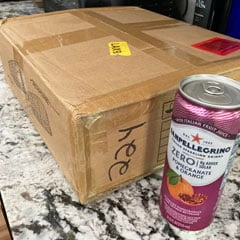
It was hard for me to believe that they sent the right package! Two 4’x2’x1′ raised planters are inside this really small box!
Since my raised bed was going to be about a foot higher than the level of my lawn, I needed to add a 12″ riser below the drip system converter. The converter itself is a similar size and appearance to a popup sprinkler housing, but it has a water pressure regulator inside of it to drop the pressure down to a level that is suitable for drip irrigation.
How to Build a Stone Wrapped Raised Bed Planter
Convert Popup Irrigation to Drip System
The first step was to dig out the soil around the popup sprinkler head. I wanted to make sure I could connect the 12″ riser and the conversion kit and not have any leaks before having stones in the way.
Digging around the existing sprinkler head was actually easier than I thought it would be. You have to go down about 7 inches all the way around the sprinkler. This type of irrigation is based on 1/2″ threaded PVC connections, so it easily to change components, usually without even needing tools.

I unscrewed the old sprinkler, added the 12″ extension using a 1/2″ F/F PVC connector, then attached the drip system pressure regulator to the top of that. I ran the irrigation zone for a minute to make sure I didn’t have any leaks.
Plan the Location of the Raised Bed Planter
I wanted a low wall of nice looking stone to be the thing that you see when you drive up to my house. My intent is to set stone so that none of the metal from the planter will be visible when my project is complete.
I had about 8 inches from the edge of the sidewalk to the front of my raised bed metal planter. I went to my local landscape materials place and picked out some gorgeous lichen covered rock. I tried to find pieces that had one flat side, were at most about 5 to 6″ thick, and that would be similar to the height of my planter.
I had trouble finding stone that would completely hide the front of the raised bed, so I decided to add some red sandstone (flagstone) behind the lichen covered rock. Using this material will also visually help tie the front edge into the tree ring material.
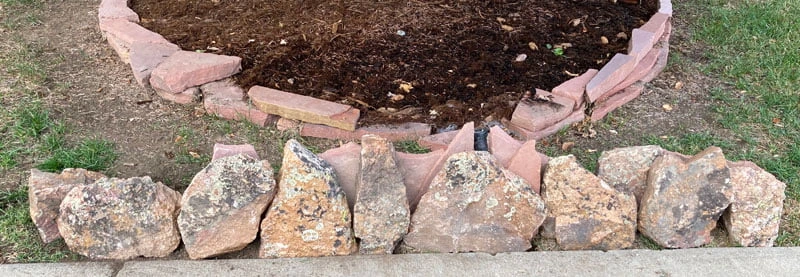
I arranged my stones in a line along the sidewalk, getting them to fit as closely as possible to each other. I placed the flattest/squarest sides down and tried to match angled sides. There is a zen to arranging rocks and you can feel when a rock gets moved into the place where it wants to be. I know that sounds “woo woo”, but that’s how it works. If a rock doesn’t go into place easily, try a different rock. Having a bit more rock than you need is helpful.
At this point, I’m not trying to finalize placement, I’m just trying to figure out where things will go. Doing a ‘rough set’ of your stones will let you know if you have the rocks you need or if you need to take another trip to the landscape materials place. Lay a extended tape measure down in front of your stones and take a picture. That will help you find the right stone pieces to fit into your 3D Rock puzzle.
Construct, Set, and Level the Raised Bed Planter
I assembled the metal planter, installed a stabilizer bar (included in the package) and set it in place. It seemed a little taller than I wanted, so I dug a 2 inch trench all the way around the planter to adjust the final elevation. I also adjusted the trench depth so that the planter was level – both side to side and front to back.
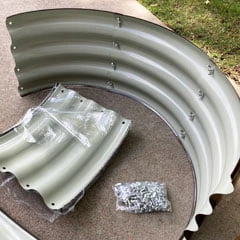
The pieces of the raised bed planter are fairly small. They are made in this wavy pattern, making the finished planter very strong and resistant to bending or deforming. The fasteners are wing bolts, so the only tool you need is a Phillips head screwdriver.
I’m glad that I dug the planter into the soil a little ways. This exposed the top layer of the network of tiny roots from the evergreen tree. Even though the soil in my planter will be about a foot higher than the tree roots, breaking through that mass of roots seemed like a good idea.
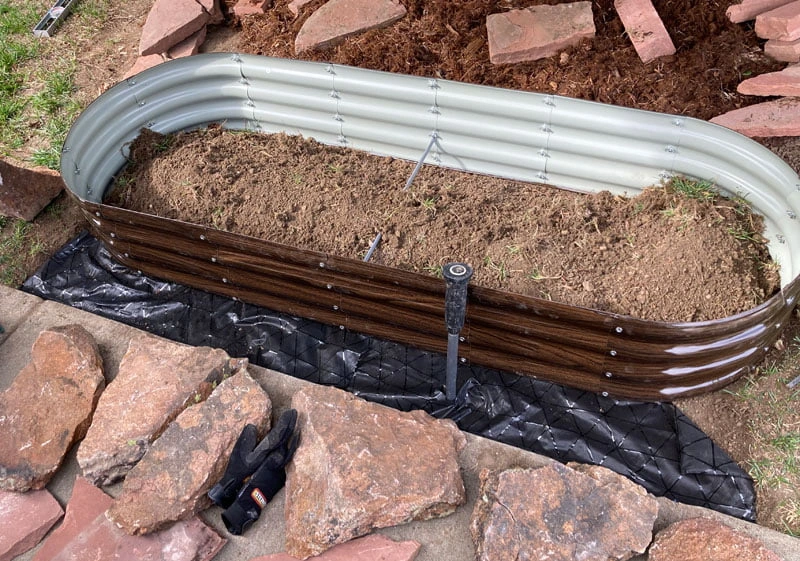
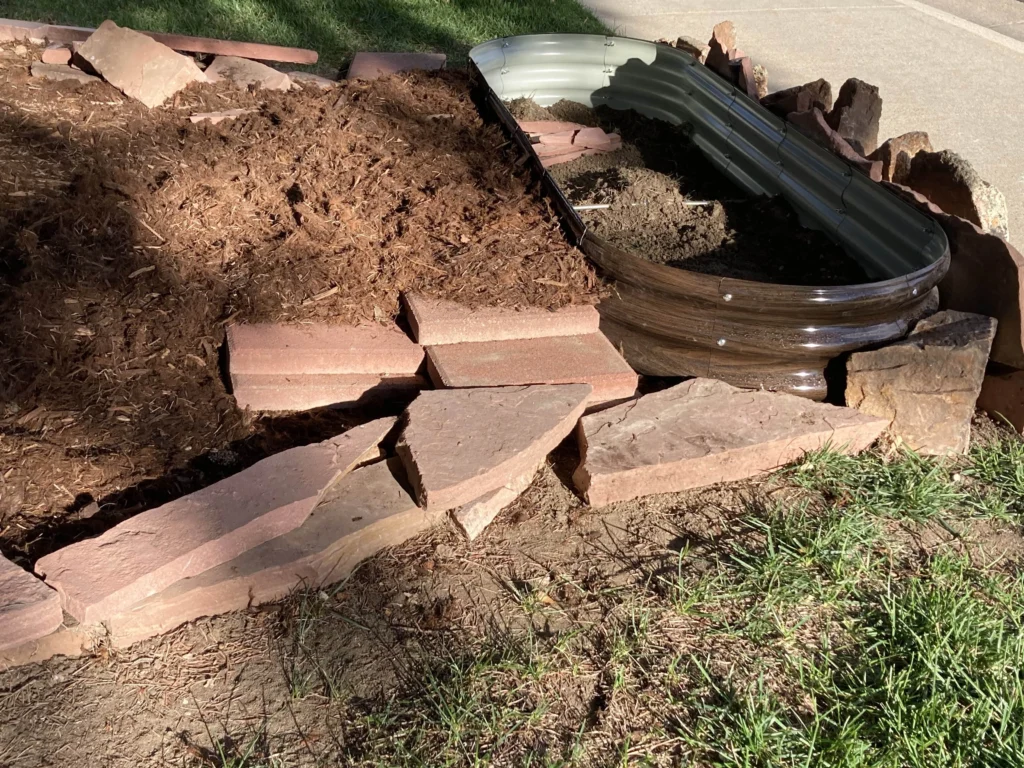
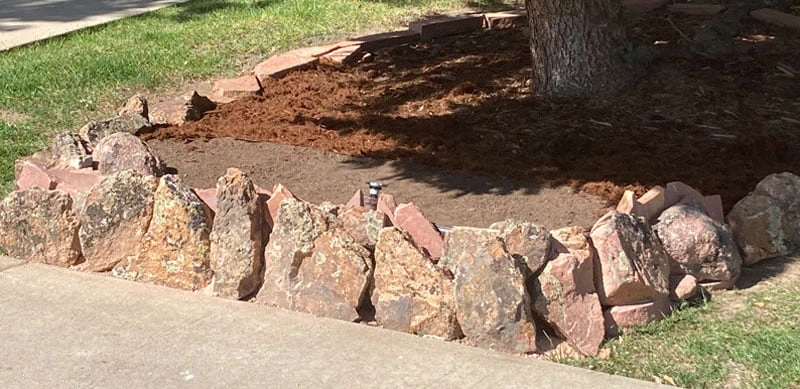
In this picture you can see the irrigation extention in front of the raised bed. The planter has been dug in and leveled. I dug out the soil in front of the planter a couple inches below the level of the sidewalk and installed landscape fabric. The fabric will be covered by pulverized red sandstone – called Red Breeze – which makes the stones easier to set and level, and also will discourage weeds to some extent.
These planters do not have bottoms – this allows water to pass on through to the ground below the planter which will continue to help the evergreen. I also did not put landscape fabric in the bottom of the planter. This allows anything I plant in the bed to put down roots as deeply as the plant needs to. I just threw all of the soil I dug out into the bottom of the planter. Later I will fill up the planter with good planter’s mix (mineral soil with rich compost already added into it).
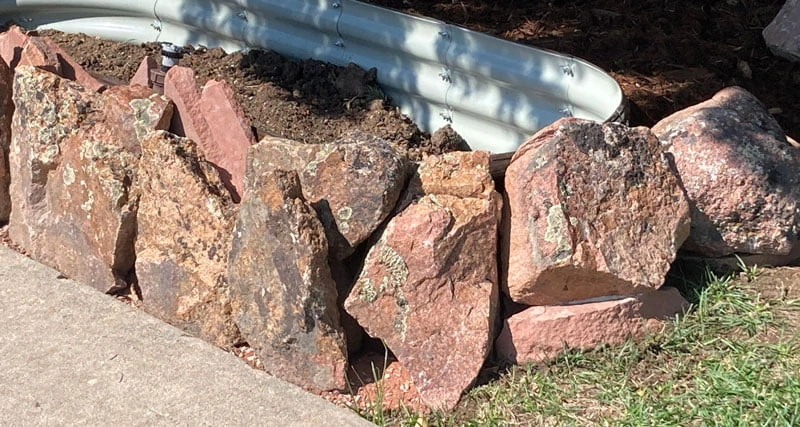
Finalize the Stone Placement – Front of Planter
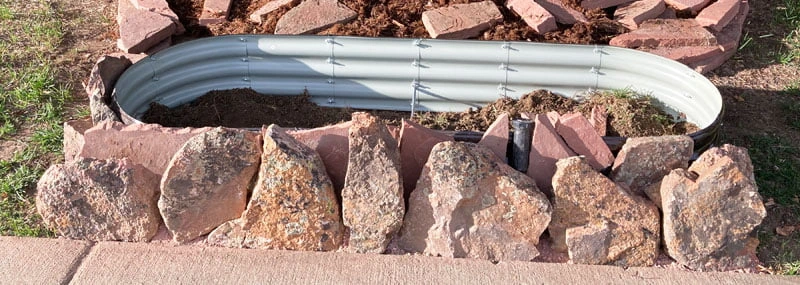
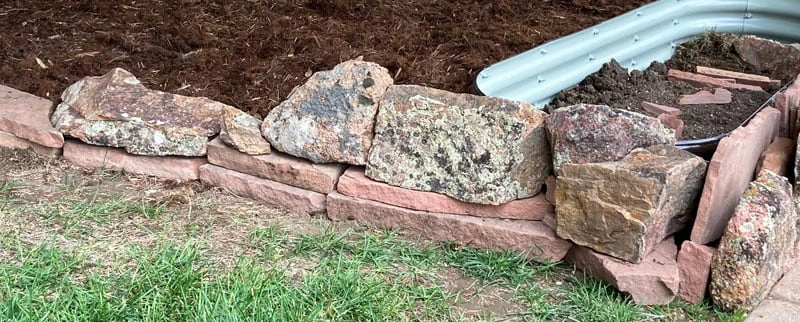
The next step is to set the stone in front of the planter for the final time. It’s important to dig the base of each stone into the crushed stone material so that it is totally sturdy and not going to tip or sag. I snugged up each stone as closely as possible to the adjacent stones, then filled in the space between the stone and the raised bed planter with red flagstone. Small gaps between the stone can be filled in with the crushed Red Breeze material when you are finished setting your stones.
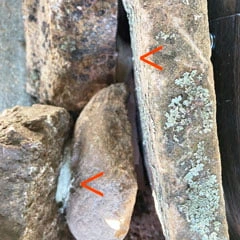
If you have any spots that are still a bit wobbly, you can add some landscape adhesive in hidden locations. This shot is taken from above the stones and the red arrows show where I added adhesive. After it dries, you can further hide the adhesive by adding more crushed Red Breeze material.
Finish Installing the Irrigation Diverter
This is a detail picture of the top of the drip irrigation conversion unit, showing the six spots where you can add drip lines. The unit comes with caps installed to block the positions you aren’t using.
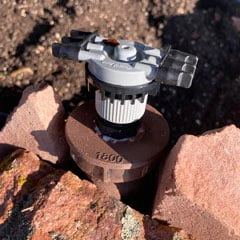
You can also see in the picture above that I spray painted the pressure regulator unit a dark brown color to better match my stone. The housing is a black color from the manufacturer. I didn’t spray the irrigation diverter though, because I didn’t want to affect it’s operation.
Avoid a Mulch Volcano
Since my raised planter is about 10 inches above the ground in the back, I first thought I’d just fill that in with my mulch – giving a smooth visual transition into my tree ring. I realized though that a thick layer of mulch like that could create what people call a mulch volcano. Basically it is applying too thick of a layer of mulch under a tree, which can look cone shaped or volcano shaped when applied all the way around the tree. The best thickness of mulch for both tree health and weed mitigation is about 3 to 4 inches. Excessive depths of mulch get matted and soggy, and can even form a composting bed, and this is bad for tree root systems.
Behind the raised garden bed, I added a couple layers of landscaping blocks. I did this to avoid creating a ‘mulch volcano’ situation.
Even though my location doesn’t look cone shaped, 10 to 12 inches of mulch all the way across a section of the evergreen tree roots isn’t good. Loosely setting these landscape blocks allows water to drain down to the tree roots. The mulch I spread over the top for visual uniformity will only be about 3 inches deep.
Wrap the Stone Wall Around Each Side of the Raised Bed Planter
The stone wall will continue at the same height as the metal planter on each side, and then can tapper down to blend into the existing tree ring.
Fill the Planter with Planting Mix
I chose a good quality planting mix that has compost already mixed into the mineral soil. Since I have stone all the way around three sides of the planter, and I don’t want any of the metal to show, I fill the planting mix up to the top.
To insure that I don’t see any of the white metal on the inside of the raised bed, I gave the top of the planter a coat of dark brown spray paint suitable for metal and for exterior applications.
Fill the Tree Ring with Mulch
I filled in behind the raised bed planter and up to the flagstone tree ring with Redwood Gorilla Hair mulch, to match the original mulch I used.
Plant the Raised Bed Planter
I’m not going to do this until next spring. I’m planning on using a variety of succulents and flowering perennial ground cover plants to fill in this garden. Both types of plants will over-winter better if they have a full growing season to get roots established. I promise to post an updated picture once the bed gets planted.
In the mean time, I covered the soil with a couple inches of mulch to keep the dirt from blowing away. That’s the picture that was used as the featured image for this article.
Sources for Materials Used for Tree Ring
Stone, Mulch, Planting Mix
I am fortunate to live in an area that has great access to local stone products. There are a number of landscape materials companies nearby, and the success of any raised bed planter landscaping project that you do is dependent on what’s available in your area. Taking a trip to one or more of your local stores can get the juices flowing for what the possible tree ring ideas might be possible with the natural materials you have available in your area.
The stone with lichen used in this project is called Elk Mountain wall rock and I got it at Colorado Materials in Longmont, Colorado. If you live anywhere near the Colorado Front Range, this landscape supply place is one of the best I’ve found. The red sandstone (flagstone) in the pictures is quarried in Lyons, Colorado and is available from a number of Colorado landscaping supply houses. They also carry the Red Breeze pulverized material. I also encourage everyone, no matter where you live to source your mulch and planting mix from a place that sells it in bulk. You’ll get a better product, pay less, and not be responsible for generating plastic waste in the form of those single use bags from the big box store.
Irrigation Conversion Parts
I was unable to find the popup-to-drip conversion kit locally, so I got it online. I selected the kit with 6 micro-bubblers, but this is the version that is probably more widely used (with six 0.5 GPH emitters):
This kit converts a popup sprinkler location to a drip system with up to 6 drip lines. It is designed for the Rainbird 1800 series, but will fit on any location that has a 1/2 inch threaded PVC pipe. A pressure reducing valve is contained in a housing that is similar in size to a 1800 head, and you get a part that screw on the top that diverts the low pressure water to 6 ports. You also get some 1/4" tubing and 6 drip emitters in this kit (0.5 GPH volume).

From the local big box store, I also used a 12 inch long M/M 1/2″ PVC pipe, threaded on both ends (for the sprinkler riser) and a F/F 1/2″ PVC threaded connector to fasten it to my existing irrigation piping.
Raised Bed Planter
This kit is designed to make two 4’x2’x1′ raised planters, but you can put it together to suit your situation. I made one 7’x2’x1′ planter for my project and have enough curved pieces left over to make a 2 foot diameter round planter. You could also make one 5’x2’x1′ raised planter + one 3’x2’x1′ raised planter. I picked the brown one because it matched my stone color the best, but there are 3 other color choices.
Sturdy yet light weight, this the the raised bed planter kit that I used for my tree ring + raised bed planter landscaping project. Panels can be configured into a number of sizes. You receive all the panels, needed fasteners, and some U-channel molding to use on the top edge of the planters, if desired.

Other Project Supplies
I had a few of my supplies on hand, such as some landscaping fabric, dark brown spray paint and landscape adhesive. Here is the adhesive that I use on all of my rock projects. I use it frequently enough that I just keep it on my Subscribe & Save list, and have it sent every month or two during the summer.
You will need a caulk gun to use this landscape adhesive. It is a gray color - but since it is typically used in hidden areas underneath rocks, the color really doesn't matter.

As promised, here’s the link to the popup sprayer head that I described near the beginning of this article. Replacing most of my original (cheap) popup heads with these ‘dual spray’ or ‘under spray’ models made a big difference for most of my lawn, because the water gets distributed better, particularly close to the spray head. They are available in 1/4, 1/2 and Full spray patterns. They can come in larger quantity packages and different spray distances (8, 10, 12, 15 feet) but MAKE SURE that whatever nozzles you order, the part number starts with “U-“ so that you get the under spray (under cut) variety. The part number is clearly marked on the top of each spray nozzle.
This is an example of one of the 'dual spray' or 'under spray' popup sprinkler nozzles that I use for my lawn. "U-" in the part number indicates the undercut pattern - giving better water spray coverage, "8" is the distance in feet of the spray, and "Q" denotes that it is designed to spray one-Quarter radius - in other words, a 90 degree angle.

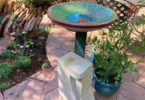
For other garden-centric DIY projects that might spark your creative juices, be sure to see Rain Barrel, Made From Scratch or Rescuing My Birdbath: Fun with Epoxy Resin Color!