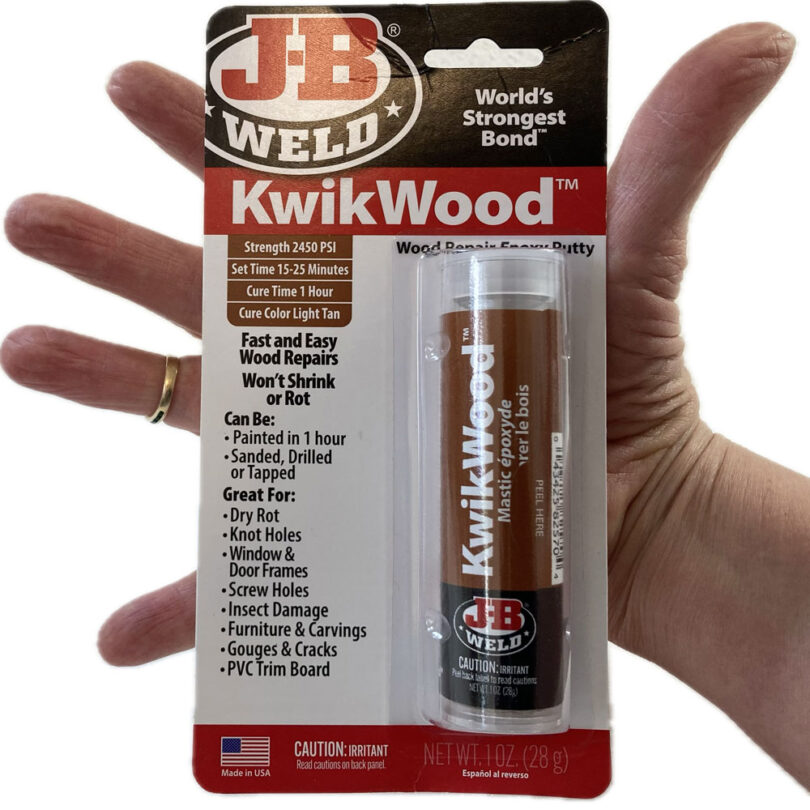
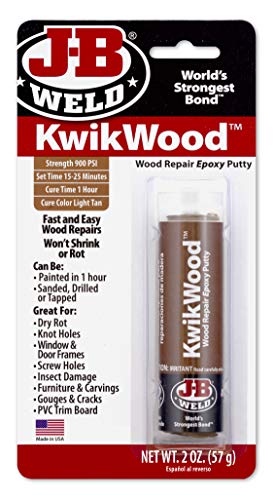
JB Weld KwikWood is a product I recently discovered to solve a problem with filling gaps in wooden furniture. It is an easy-to-use wood epoxy from JB Weld for my project that involved a vintage painted wooden bench. It worked so well for this application that I wanted to share it with everyone.
I planned to stabilize my bench by re-gluing all the places I could with regular wood glue, but I had areas where the old wood no longer could be clamped together. I needed a gap filling wood glue. After doing some research, I decided that JB Weld KwikWood was my best alternative.

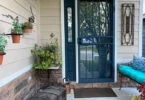
Eventually this wonderfully decorated painted bench will go in my garden as a backdrop for perennials and as a structure for climbing plants. Since it will be exposed to weather – sun, rain, snow, wind – I wanted the wooden structure to be as strong as I could, and filling in the gaps in the wood seemed like it would be a good idea. I also plan on giving the entire bench a couple coats of clear matte sealer that is rated for outdoor use as a final level of protection.
About JB Weld KwikWood
Application of this Gap Filling Wood Glue
The two-part epoxy comes in an easy-to-mix formula. Instead of two messy tubes of liquid, this epoxy is in solid form: one part is in the center and the other part forms a ring around the outside. You don’t have to guess if you are getting equal portions – you just cut off a bit of the stick and mix the putty together. I found it simple to work with and had plenty of time (at least 15 minutes) to apply it to the cracks and to smooth and shape it. Once mixed, it’s a thick consistency that holds in place well, making it ideal for filling gaps or securing joints. It dries to a solid and smooth finish.
This material is not smelly at all. I did not notice an odor at any time while working with it. Do WEAR GLOVES while you are working with it. It is not super sticky, but it will coat your fingers a bit while working with it. The best cleanup material I found to clean my gloves and tools was Isopropyl Alcohol (see video).
Strength
Once the epoxy cures, which only takes an hour, the bond was rock solid. It has a strong grip that’s perfect for wood, and it’s able to withstand the stress of regular use—especially on furniture or other high-pressure wood repairs. The bond was so strong that I didn’t even feel the need to reinforce with screws or nails. You can paint, stain, sand, or drill this material an hour from the time you mix the material together!
‘Super Powers’
- JB Weld KwikWood is designed to repair wood joints that are subjected to a lot of stress – a perfect example would be a wooden rocking chair. For a great laugh, check out the manufacturer’s video where a rocking chair is featured (I couldn’t find a direct link to the video, so follow my link below to the product on Amazon, then click on the video thumbnail to get you there). Too funny!
- Filling Gaps – my bench project is only one example. If you have a gap bigger than about 1/16″ (1mm), JB Weld KwikWood is probably going to work better for you than standard wood glue. This product works especially well with vertical gaps because it won’t leak out as it sets up.
- Filling knot holes – in particular, if you have lost the center of the knot, or can’t get it to go back in smoothly, use JB Weld KwikWood to replace the knot. If you leave the top of the surface slightly convex, you can sand down to a smooth surface after the product dries. Another tip you can try is to fill the hole, get the surface as flat as possible, then put a small piece of waxed paper on the surface and press down with something flat. The side of a glass bottle works well for this task.
- If you are working with a wood item that has been carved and you are trying to match the original contour of the carving while filling in a gap, there is nothing that beats this product for getting a nice smooth match.
- Retrofitting new hinges into older wooden doors: New hinges never quite match the old ones, do they? After installing new hinges, you can fill the gaps in both the door and the frame around each hinge. The JB Weld KwikWood package says it is a tan color, but I would call it ‘off white’. This will probably not match a stained door and frame, but for painted doors and frames, this product is terrific! The product package says that it will accept stain, but I have not tried this yet on any of my projects.
Gap filling wood adhesive in an easy-to-use two part epoxy putty. Just cut off a piece of the 1 ounce stick, mix and fill in gaps in your wood projects.
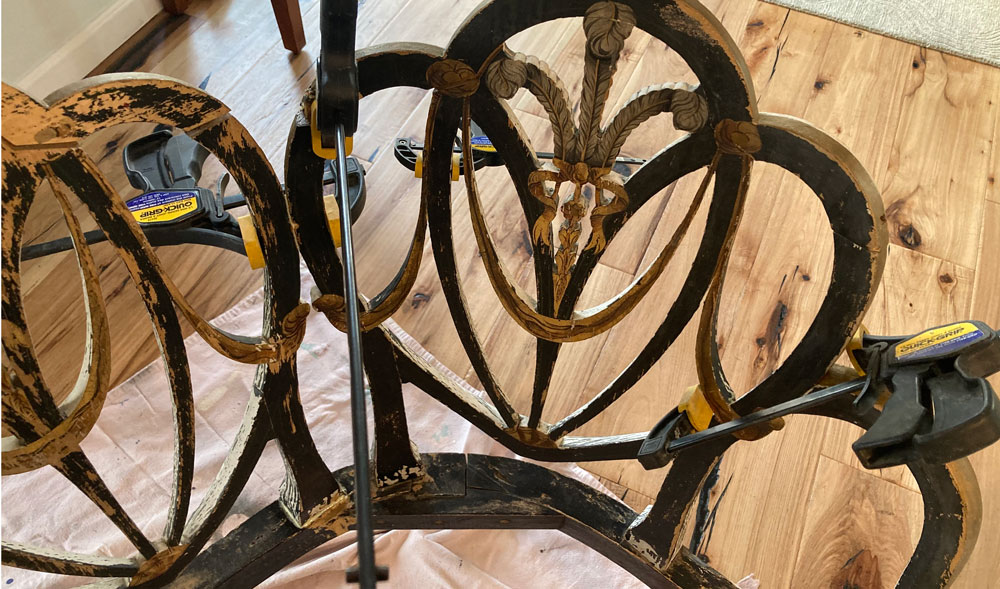
My Painted Antique Bench Project
For my wooden bench, I first located all of the places where the wood could be glued and clamped. A couple of the pieces had come completely off – but most of them were still available when I bought this piece at an estate sale.
I glued each area I could with yellow wood glue, clamped each connection, and cleaned up any excess glue with a wet rag. I left the clamps in place for 24 hours.
I then identified all the spots where I wanted to use JB Weld KwikWood – and since the painting on this piece is a little busy, I just put a little piece of blue tape in the locations where I wanted to do gap filling in the wood. That way I don’t have to search for my repair locations when my epoxy is starting to harden up.
You have a fair amount of working time (15 minutes before you can start to feel the putty start to stiffen) with this material, but I thought I would mix up just a small portion to start with and test it in one of the gaps. Then I would have a good idea of how much more material I needed and about how much time I needed to apply it to other gaps.
See my video for the exact process of preparing the epoxy material and applying it to different types of gaps. I used about a finger-width of the material for my first attempt and since my gaps were small and I wanted to get the surfaces very smooth, I had more material than I could use in 15 minutes. You can feel the epoxy getting slightly stiffer as you reach the 15 minute mark. The package says you have up to 25 minutes of working time, but after 15 minutes it starts getting stiffer and a little harder to work with.
I found it useful to wet a couple small pieces of paper towel with Isopropyl Alcohol before starting. I used these paper towels to clean residue of the epoxy from the fingers of my gloves and to smooth the surface of the epoxy once I got it applied. Since my wood was rounded, I also found that a metal tool with a round shape was useful for pressing the epoxy into the gaps and finishing the surface shape.
I recently received a comment on my YouTube video from someone asking about how a big gap like the one shown in my picture even happens. I thought I would comment about that here as it might be helpful to those who are new to woodworking, especially regarding very old furniture. I had about 6 places in my bench that had a gap of 1/8″ or more, so gluing and clamping was not possible. Gaps can occur for a number of reasons, but the most common are:
- The wood was not completely and uniformly dried before something was made from it
- The wood was sufficiently dry for it’s manufactured location (say The Midwest or the East Coast or the South East of the US) and then the furniture gets moved somewhere much drier, such as Colorado or the desert Southwest.
- The furniture was stressed in some way, so the component parts shift over time.
Gaps happen, especially in old furniture. This Trompe-l’œil bench is probably close to 100 years old.
Video of the Gap Filling Wood Repair

For those of you who prefer to read the transcript, here it is:
JB Weld KwikWood is a terrific epoxy product for fixing a number of wooden items and in today’s video I’m going to show you how I use it to repair old furniture. I have this wonderful old wooden bench and I’ve glued what I can with regular wood glue, but the bench has gaps in it.
JB Weld has this epoxy product (you can see the the two-part epoxy in that roll) It’s terrific for filling gaps where you can’t clamp the wood close enough together for wood glue to work. I’m going to cut off about three eights of an inch of the product here and peel off the the outer protective layer.
You can see the light brown and the dark brown: that’s the two different parts of the epoxy and you just have to mix it with your fingers as I’m doing here. Be sure to wear gloves because it will get into your skin and you can even see it starting to coat the gloves a little bit as I work with it. It takes about a minute of working with it to get it so that you can’t see the difference between the light color and the dark color and that’s when you know that you’ve mixed it up enough.
After mixing up the JB Weld KwikWood product, you just use it like modeling clay. Break off a bit of it and roll it into a little worm shape and then just fit it into your gap. Press it and rub it and push it in with your fingernails. Rub over the top of it – anything that you can do to completely fill that gap. You can see that it’s it’s not really that sticky. iIt sticks to my gloves but to the wooden surface it tends to just kind of roll or rub off of the top. Work it in all the way around the gap wherever you can get to it. The bond will be the strongest if you can fill the entire area.
I have a piece of paper towel that is soaked with isopropyl alcohol: use this to wipe the excess material off of your gloves or tools. Once you’ve worked the JB Weld completely into your gap you can also use this paper towel to wipe the surface and to to get a smoother appearance over the entire area.
Since my furniture has rounded edges, a tool with a rounded shaft like a small screwdriver or an awl can be used to flatten and smooth the area and to remove any excess epoxy. I’m also just scraping the surface with my fingernail to clean up the last little bits of unwanted material.
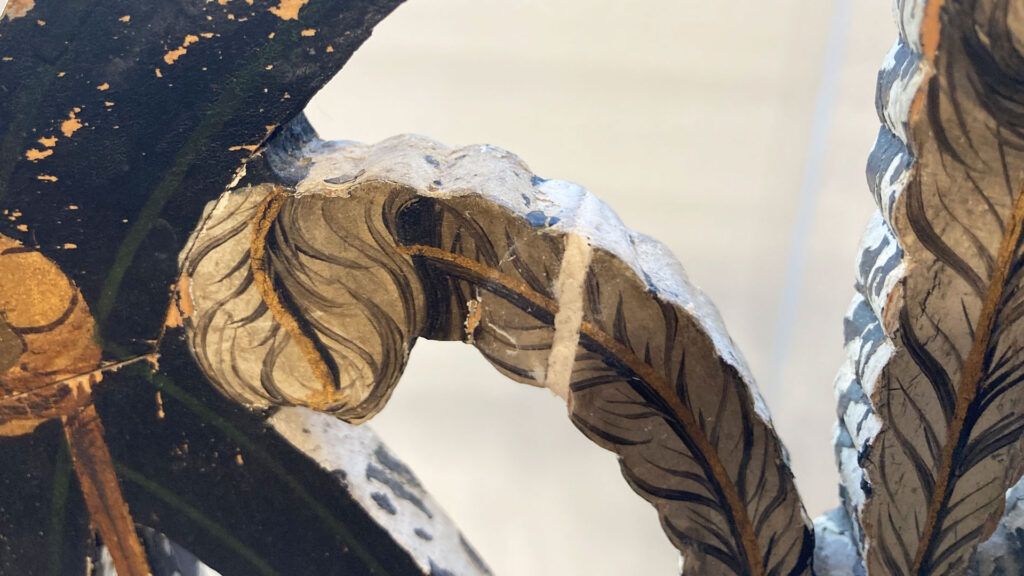
Here is a closeup of my gap repair. Wait at least 1 hour before sanding or painting the area.
Compare to Standard Wood Putty Products
I like this product far better than any of the wood putty products (usually in a can or tub) I have used. I find JB Weld KwikWood easier to work with because you can form a piece to place in a gap and it doesn’t get spread all over the surface of the wood (less cleanup). Frankly, working with it is like using modeling clay. The regular wood putty products that I’ve used are either like a sticky paste or are crumbly.
Summary
JB Weld KwikWood is an excellent choice for DIYers or anyone looking to repair wooden items that need an extra strength bond or have gaps that can’t be clamped to eliminate the gap. It’s perfect for furniture restoration, filling cracks, or even more substantial wooden structures that need a permanent fix. Whether you’re working on a small craft project or fixing a beloved piece of furniture, this epoxy is a game-changer when you need strength combined with the ability to easily shape the fill material.
Table of Contents
Other Products/Tools used in This DIY Project
A common solvent that I use in my DIY projects is Isopropyl Alcohol. It is also good for cleaning sticky debris after peeling off a paper sticker, or getting permanent marker or ink off of a surface like plastic or glass.

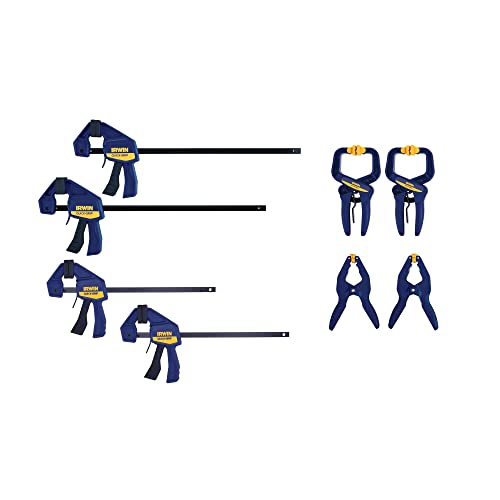
I have been using Irwin Quik-Grip clamps for over 30 years. They are easy-to-use and easy to be able to tell how tightly to clamp, then they are easy to release. They come in a variety of convenient sizes and are not heavy like some clamping tools. They deserve their own product review, but for now, I will just link you to a set of several convenient sizes.
Other Articles on Furniture Repair and Using Epoxy
If you have scratched furniture or cabinets, be sure to see this article on an easy way to Repair Scratches in Furniture.
In this article I revive an artist-made birdbath by coating the basin with epoxy and make it colorful using Mica Powder: Rescuing My Birdbath: Fun with Epoxy Resin Color!