Learn this simple method of making Economical yet Elegant Beaded Necklaces
Tying a Sliding Knot (for Adjustable Length Jewelry)
Sliding knots are adjustable knots used to make all sorts of adjustable-length jewelry. No clasps, crimps, or jump loops are necessary. All you need is plenty of cord and a pair of scissors. Sometimes, people also refer to these knots as slip knots and others refer to them as barrel knots because of the way that they look after they are tied.
Select Your Necklace Finished Length
Allow an additional 10 inches of cord for the knotted section of your piece. For example, if you want the finished length of a necklace to be 16 inches, start with at least 26 inches of cord. Since you can trim the cord after tying the first knot if it seems too long, you might want to start with a little extra. A “medium” length necklace is typically 16 to 18 inches for women and 18 to 20 inches for men.
Tip: measure one your existing necklaces where you like the length, and use that value as your guideline.
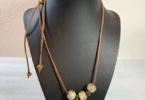
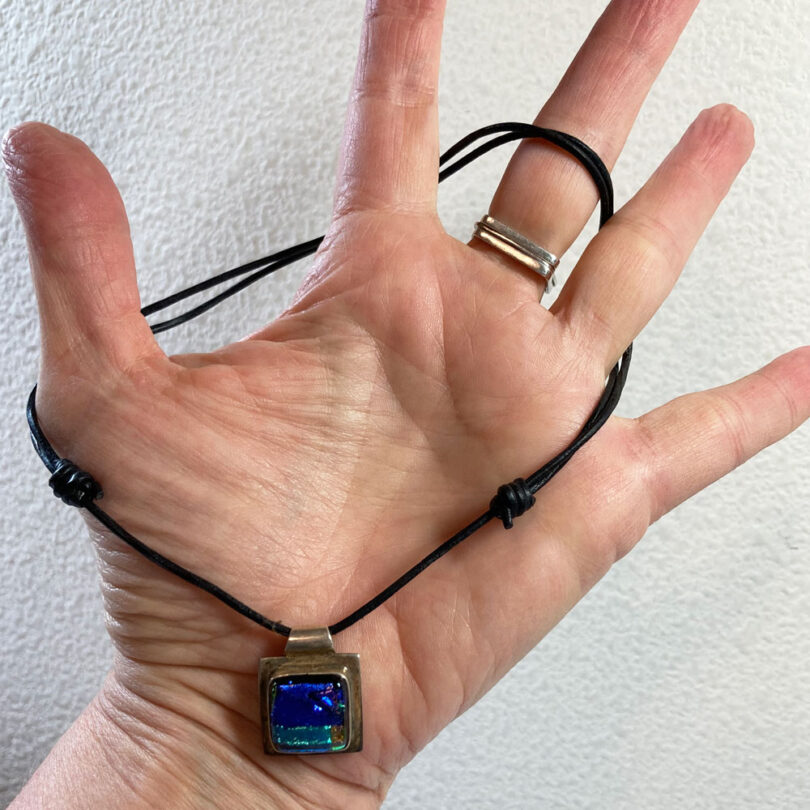
The necklace with the dichroic glass and sterling silver pendant that is shown in the featured image is usually worn at 18 inches, so I started with 28 inches of cord when I made it.
Selecting Your Cord Material
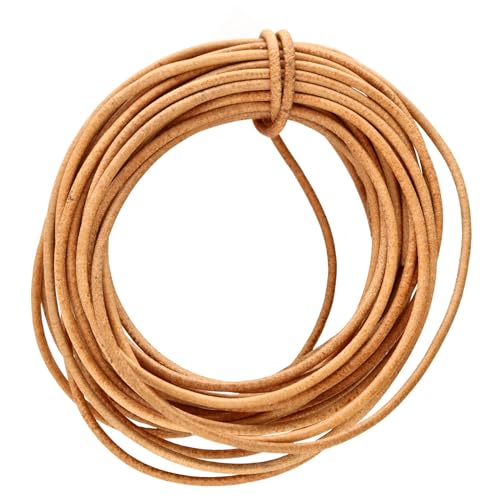
You can use any non-stretchy smooth cord for this Sliding Knot Necklace project. I am using Greek Leather, which is my absolute favorite material for necklaces like these, but there are Cotton and Polyester cords that will also work. Products called “Rat Tail” are pretty, but they tend to be a little soft to hold the sliding knots tightly and you may find that the knots just fall apart. There are some nice Hemp cords available in a lot of colors, but be sure to select one that is smooth (hemp can be scratchy on your skin).
My favorite size of cord for Sliding Knots is 1.5mm diameter. Cord thinner than this tends not to slide very well and cord fatter than about 2mm tends not to knot as tightly.
This leather cord is exactly what I am using in the tutorial pictures. It comes in Natural and Black (as I show) and about 20 other colors. This is the 1.5mm thickness and it comes in 5 meter lengths (about 16 feet). It is also available in full hanks (50 meters) if you plan on make LOTS of necklaces.
NOTE: In the pictured step illustrations, I have used two colors of Greek Leather so that it is easier to see the knotting technique. When you create your Sliding Knot jewelry, the two ends will probably be the same color, and it will look more like the “All Done!” picture.
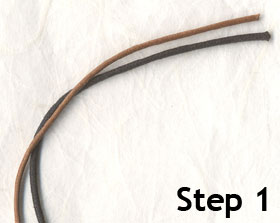
Step 1: String on the bead(s) or pendant that will be the focal part of your necklace. Align the free ends of your cord.
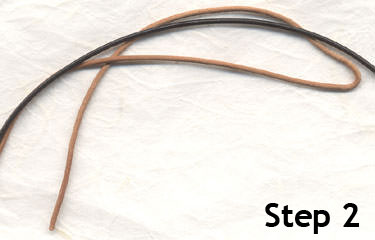
Step 2: Fold about 5″ of one end back on itself (shown in brown in this picture).
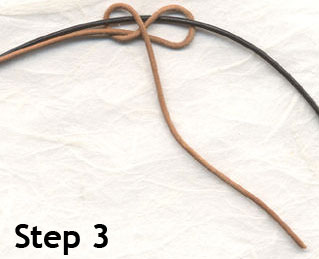
Step 3: Pinch the bended part of the cord together around the other loose end. Leave about a finger width of space at the end.
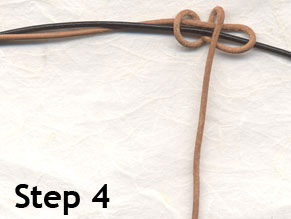
Step 4: Wrap the free end of the bent cord around all the cords a few times coiling back towards the bent end. i like to use at least three coils to make a neat & secure knot, but you can choose how many loops you like for your design.
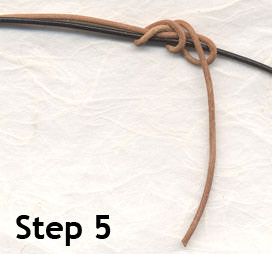
Step 5: Continue to wrap the cord around to make at least three wraps.
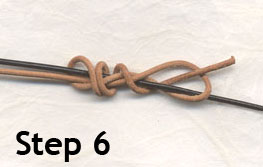
Step 6: Insert the end of the cord you are tying the knot with through the loop on the end. Push the coils toward the loop.
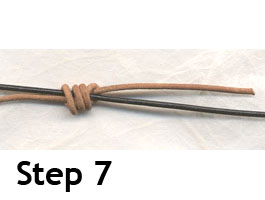
Step 7: Tighten the knot.
Step 8: Tie another sliding knot on the other side of the necklace. Check to see if the necklace still looks the right length. When you are satisfied with the length, trim off any excess cord below the knots
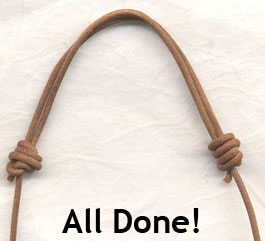
When the sliding knots are close together (about 2 inches or so) the necklace should be long enough to just slip over your head. Then carefully slide the knots farther from each other to achieve the length that you want for wearing the necklace. Over time, the knots should slide more easily as the cord picks up a bit of oil from your skin or from products like lotions.
Tip: When you are just getting started, you may want to tie the second knot at the far end of the available cord. Try the necklace on, and if too long, untie the knot, cut off a bit of cord and re-tie it. I find that I get better at tying the knots each time I repeat the tying process.
Attaching Pendants to Your Necklace
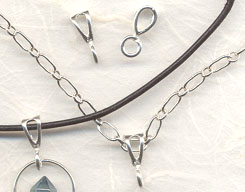
Sometimes you have the perfect focal piece for a Sliding Knot Necklace, but it doesn’t have a hole going through it. Maybe you found a cool vintage piece in a thrift store or Grandma let you pick out something from her collection. If that awesome focal pendant has a small loop on top, you can use a finding called a Bail to hang it from your necklace. Here is a link to a Sterling Silver choice to get you started.
This bail is 925 Silver, and comes with an open loop to make it easy to attach to a pendant. Several different sizes are available for this listing - I'm sending you to one that is 14mm.

Other Knotting Resources
I hope you enjoyed this tutorial. If you want to check out other installments in the knotting series, check out Best Knots for Beading: Half Hitch.
If you are working with flat leather cord – sometimes called leather lace or lacing cord – you might have better results using the sliding bead method instead of sliding knots. I’ve written a detailed tutorial Adjustable Length Necklace – No Sliding Knot Required! that explains how to use large hole metal beads to form the sliding length adjustment for a necklace.