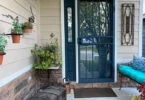
When I moved into a new place about a year ago, I had the perfect location for a rain barrel. I wanted to use the water it could collect to care for my container plants in the front of my home. It also was a spot where the water tended to pool after a rain storm, so capturing some of the water would avoid a muddy puddle.
There are Laws …
Laws around Rain Barrels vary from state to state. Here in the arid west, it used to be illegal in Colorado to collect the water that fell on your own roof! You had to specifically own the water rights on your property to use even one ounce of the water that fell on your property. While I don’t think that law was rigorously enforced on city dwelling homeowners, the Colorado legislature realized that it was something that needed to be resolved.
If you live in Colorado, here is some more detailed information from Colorado State University on Harvesting Rainwater.
If you live in another state (especially the dry western ones), I encourage you to check out what the rules are in your area before investing in a rainwater storage device.
In 2016, the new law in Colorado allowed most homeowners to have up to two rain barrels with a total maximum combined capacity of 110 gallons. Yay! I started looking for my first rain barrel.
Wow! These things are UGLY!
I soon realized that a great many of the pre-made rain barrels on the market were super “design challenged”. At least 60% of them looked like a traditional old brown barrel. Not my style! I also looked at the measurements and a 55 gallon barrel is a very large thing. I really didn’t need to maximize my storage, I just wanted to water some container plants.
What I really had in mind was something that looked like a tall planter, and had a place on top to plant some annuals (petunias and such). I did find this choice, and I think it is nice looking – and there were several choice of color:
Nice looking Rain Barrel looks like a tall planter and has a space in the cover to plant some flowers or set a flower pot. Can store up to 50 gallons of water and has two faucets (one for filling your watering can or pail and the other for draining the barrel for winterizing).

Sadly, it was just too big for my limited space. Well, long story short, I just decided to make my own rain barrel.
I Decide to Make My Own Rain Barrel
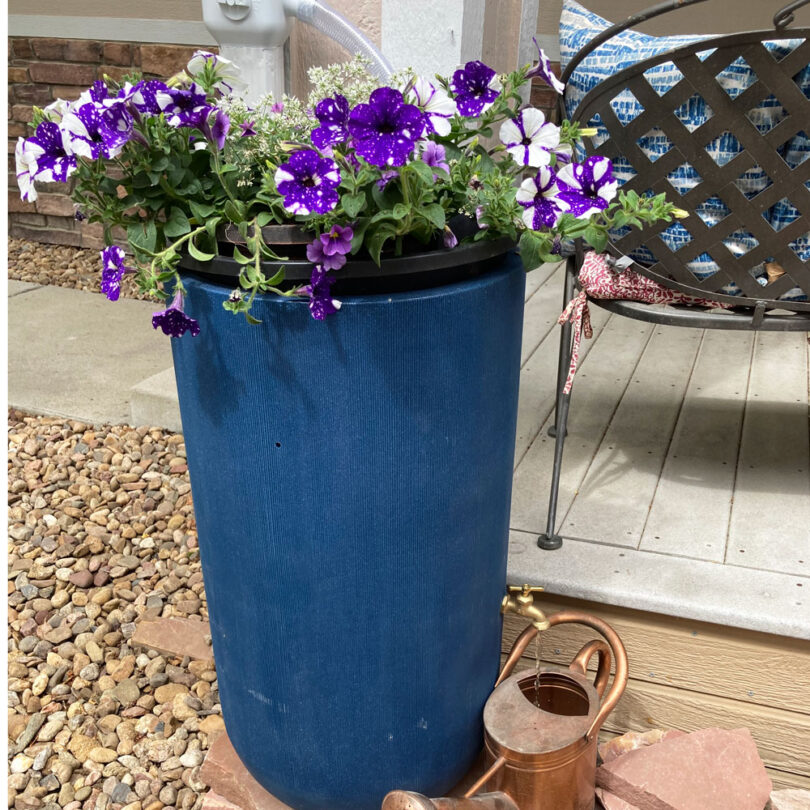
I decided to start with a very large, durable plastic planter. It needed to NOT have a drain hole pre-drilled in the bottom. It needed to have a reinforced top to make it strong enough to hold the weight of the water. The round shape would also be stronger than anything with edges. I looked for a pot material that was pretty thick, but that I could drill through with a hole saw, because I needed to add my own faucet. I found just what I needed at Home Goods. Mine is 17 inches in diameter and 32 inches tall. Even though the plastic is rather thick at 3/32″, the entire pot only weighs a few pounds. It is designed for outdoor use.
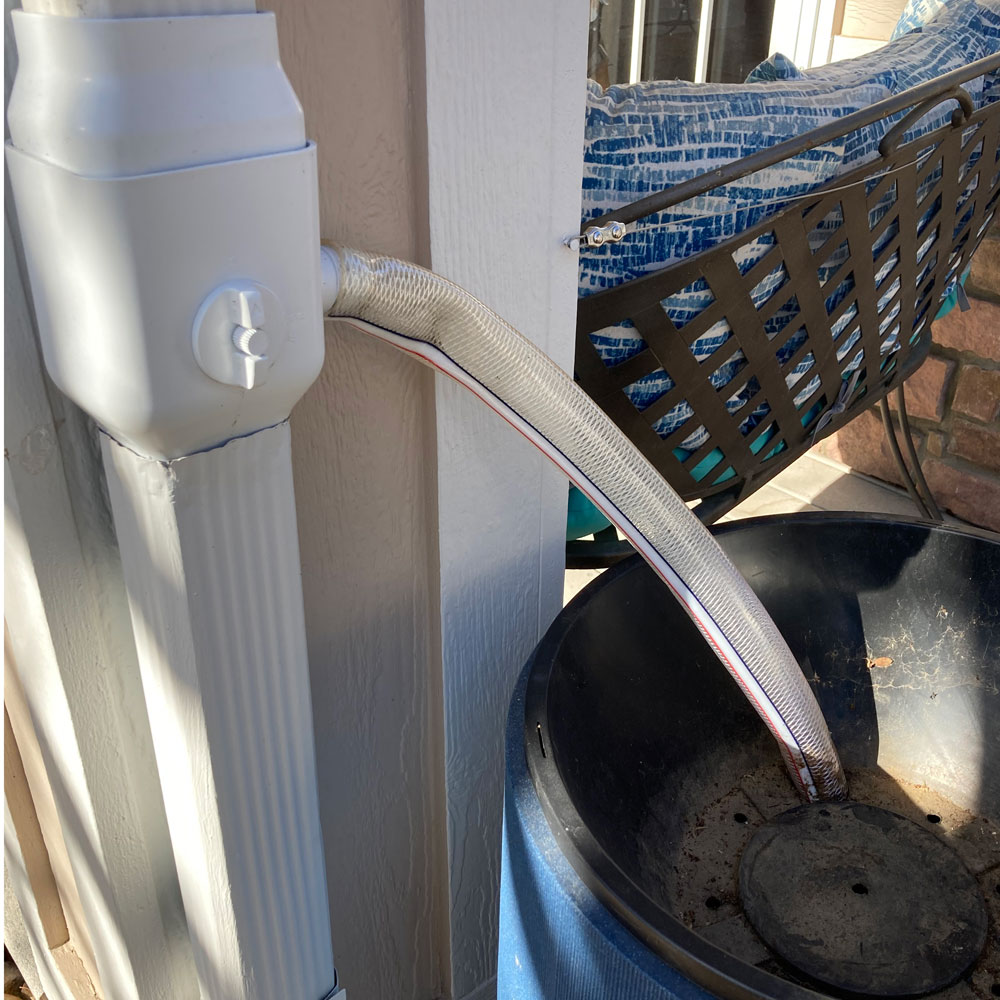
I located the rain barrel right next to one of my down spouts, so that I would easily be able to direct the water into the barrel. I researched down spout diverters, and decided on one that had a water control handle on the front.
This is the one that I used. I had to cut my down spout with a hack saw in the correct location, then installing the diverter device was really easy. The switch in the picture is set to winter mode: allow the water to pass through to the ground. In the summer, you just turn the switch to the other position, which directs some of the water coming down the spout into your rain barrel.
Please note that not all down spouts are the same size. Please measure your down spout and select the right diverter for your application. I’m sending you to the category page so that you can see all the choices.
A Downspout Diverter gets installed in your downspout (be sure to measure your downspout because they are not all a uniform size!!). Turn the handy knob to send the water into your rain barrel or just down the spout (when your barrel is already full - or in the winter). This link takes you to the 2x3" version that I bought, but you might need a different size.

The diverter comes with a clear hose – I just cut it to length. It comes flatter and rolled around itself, so it is good to put it in a bathtub with really hot water to help it unflatten a bit before using it.
Solution for A Planter on Top of my Rain Barrel
I found a black plastic shallow planter that just fit in the top of my decorative blue planter. The edge of the black planter rests on the top edge of the blue one. Then I cut a hole just big enough for the hose to fit through in the bottom of the black planter. I directed the clear hose into the hole. There is plenty of room to set a pot full of petunias in the middle of the black planter.
Install a Water Spigot
To be able to fill my watering can, I installed this brass plumbing fitting in the side of my planter at the right height (about 12 inches from the base, in my case). The lower you can install it, the more water that will be available to draw from the barrel.
A very simple & classic brass spigot was what I was looking for when I designed my DIY Rain Barrel. Just like this!
![Brass Hose Bibb [79-112] Compares to Arrowhead Brass 3/4"Male NPT Inlet with 3/4 water hose outlet ideal for gardens and patios Llave de Manguera o Nariz 3/4"](https://m.media-amazon.com/images/I/51F9IF+U++L._SL500_.jpg)
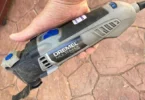
Installing the brass faucet was simple. I just used a hole saw to drill a hole that was just a bit smaller than the diameter of the faucet, then threaded the base into the hole. On the inside of the barrel, I added a pipe fitting that was the right size (3/4 inch) to thread onto the faucet base.
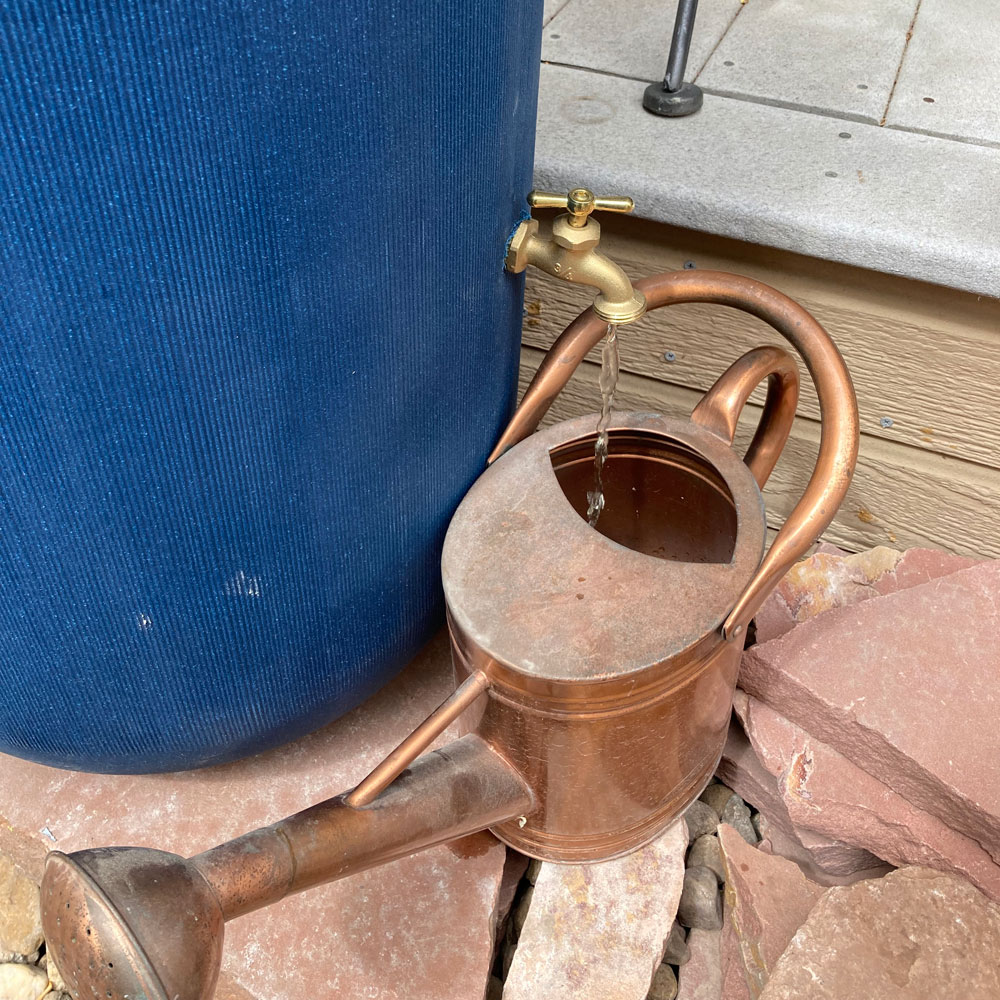
Remember that there is very little pressure in a rain barrel, so running the water through a hose doesn’t work very well. Even decanting the water into a pail or watering can is fairly slow (a minute or two to fill this copper watering can).
I drilled a 1/4″ hole in the back of the Rain Barrel, just below the level of the shallow black saucer top. That way, if I get a lot of rain, my flower pot won’t float out of the top! I estimate that I can store about 20 to 25 gallons of water in my finished Rain Barrel.
The amount of water you can collect is dependent on the amount of area of your roof and how that water is directed to your down spouts. From experience, I can tell you that it doesn’t take a very big rain storm to collect enough water to fill a barrel.
Non-Potable Water!
Just because the water in your Rain Barrel comes from rain and (in some locations) snow, don’t assume that it can be used for drinking water. The trip over your roof and through your gutter system makes this water fine for watering container plants, vegetable gardens, shrubs and trees, but is not safe to drink.
Winterizing a Rain Barrel
This is my rain barrel in the winter. I disconnect the diverter hose and remove the black planter top and store those in the garage. In their place, I use this large plastic saucer that keeps the snow from getting into my rain barrel in the months where the water can freeze. This protects my rain barrel from getting ice inside and cracking the bottom. I found some nice looking artificial pine branches and used a hot glue gun to fasten them into the saucer. This gives my planter a nice finished and decorative look in the colder months of the year.
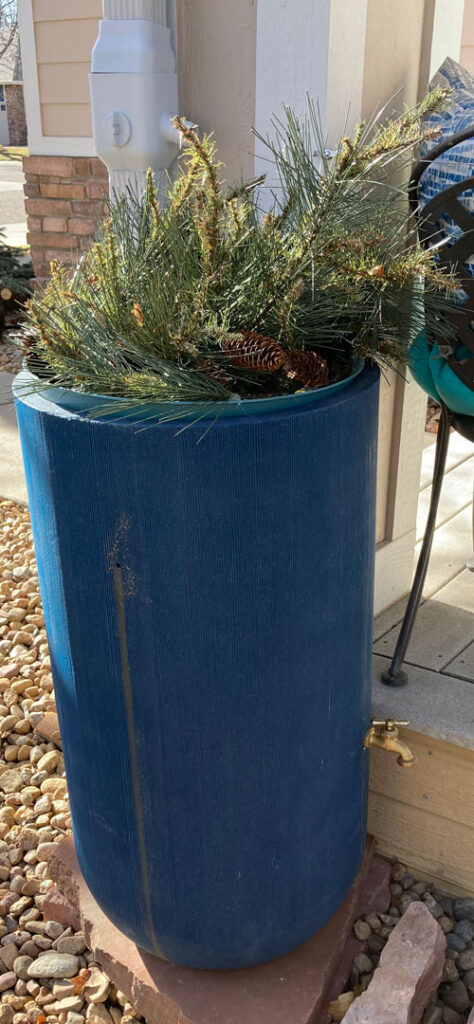
I decided to only use one brass faucet in my rain barrel. When I winterize the barrel, I just use up all the water than I can from the faucet. To reuse as much water as I can, I then just use a small bucket to bail out the rest of the water and pour it on my shrubs. Then the barrel is light enough that I can just tip out any remaining water.
To make sure the rain barrel doesn’t blow over with the wind, I put a big rock inside it. In the summer, I remove the rock because the weight of the water is enough to keep it in place. Also note from the picture just above that I have my rain barrel sitting on a big piece of flagstone so that it has a flat and level surface to sit on.
Table of Contents
Other articles on this site regarding garden watering include Brass Quick Connects – Best Garden Hose Fittings! I discuss converting a popup irrigation head with a small drip irrigation system in Unique Tree Ring Ideas Using a Raised Bed Planter.
For those who are interested in Sustainable living topics, an article you may find interesting is Used Coffee Grounds – 13 Awesome Reuse Ideas. Much like not wasting and reusing water, this article covers ways to make the best use of coffee grounds in some ways that go beyond composting.